15% off £30 OR 20% off £40
Dyeing your hair: everything you need to know
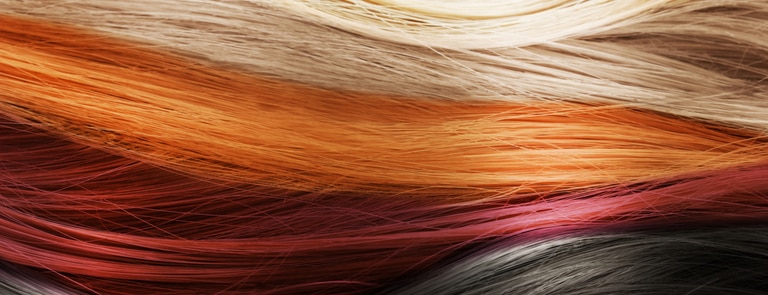
Feeling a bit bored with your hair and fancy a change? Maybe you want to try something different, but don’t want to change the style or the length?
One of the quickest ways to switch things up is by changing your hair colour. And the good news is, you can do it yourself and save yourself time and money in the process! Find out all you need to know about dyeing your hair in this guide.
Skip to:
- Using your skin tone
- Hair colours
- Ways to dye your hair
- Dye ingredients
- Alternatives
- How to dye hair at home
- Pros and cons of lightening hair naturally
Which hair dye is best?
Rather than choosing a shade that you happen to like and then applying it to your hair, it’s important you consider the overall ‘hair picture.’
Will the colour that looks great on the model on the front of the box look the same on you? Will the shade suit your skin tone in reality? These are the questions you must ask yourself. So to help you figure it out, we’ve got the low down on hair colours and skin tone below.
Warm skin tones = warm hair hues
Warm hair colours tend to work well with warm skin tones. If you’re looking to go blonde, then make sure it’s more of a golden beige or buttery blonde. And if you’re itching to go brown, then go for a caramel or butterscotch shade. As for red, stick to golden copper colours.1
Cool skin tones = cool hair hues
On the other end of the spectrum, cool skin tones go together with cool hair colours. Platinum, beige blonde and baby taupe blonde are the best blonde shades for cool skin tones. If you want to go brunette, then stick to dark chocolate and espresso-type colours. As for red, it’s perfectly do-able, but it needs to be cool red, e.g. merlot, burgundy or subtle shades of mocha.1
Neutral skin tones = hundreds of hair hues!
If your skin has neutral undertones, then you’re in for a treat, as you’re most likely to pull off almost every hair colour! Pretty much any shade of blonde – from pale beige to amber blonde – will suit you. So will most shades of brown and red – so let the hair colour experimenting begin!1
How to determine your skin tone
Not sure what your skin tone is? Then it’s best you do the wrist test.
Take a look at the underside of your wrist where your veins are and see what colour they are. If they are blue/purple, then you have a cool skin tone. If they look more green/yellow, then you have a warm skin tone.2
If you’re still not sure, then focus on your eyes and natural hair colour.
People with cool skin tend to have blue, green, pale brown or grey eyes and naturally blonde, brown or black hair with ash tones.
Those with brown, amber or hazel eyes and hair that’s naturally auburn, brown or black hair with hints of red, copper or golden tones, are warm toned.3
Still not sure about which colour to choose?
We hear you. If only we could just click our fingers and have the hair colour of our dreams... For some of us, changing shade is more of a transitional thing, especially if we’re going from dark to light or vice versa.
Two top tips for you:
- Try to stay within two shades lighter or darker than your current colour to achieve a result that’s between your natural colour and the colour on your hair dye box 4
- You can dye your hair when it’s wet. Doing it this way means you’ll lose less dye and get more even results. 5
| Original shade | New shade | Difficulty |
|---|---|---|
|
Black |
Platinum | High (14) |
| Black | Brown | Medium (15) |
| Blonde | Brunette | Low (16) |
| Blonde | Red | Low (17) |
| Red | Dark brown/black | Low (18) |
| Red | Blonde | High (19) |
What colour should I dye my hair?
These shades have been flagged by the ‘in the know’ stylists as being among the ‘in’ colours10:
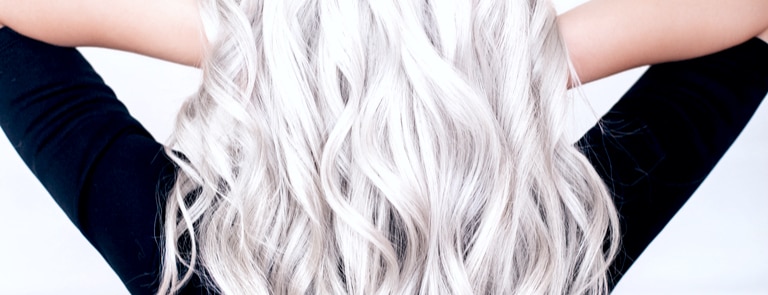
Nordic white
This ultra-white, almost grey shade has taken platinum blonde to a whole new level.

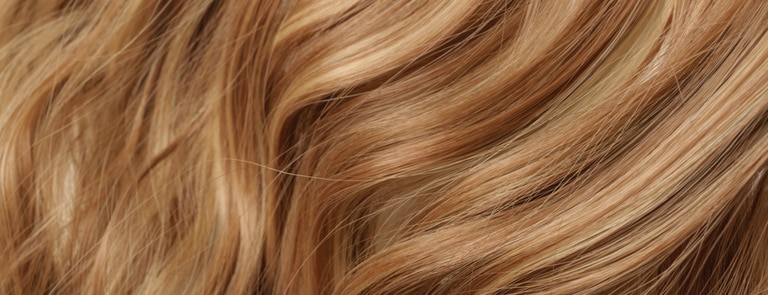
Cinnamon swirl
Caramel and auburn highlights are mixed together to create highlights without going too light.

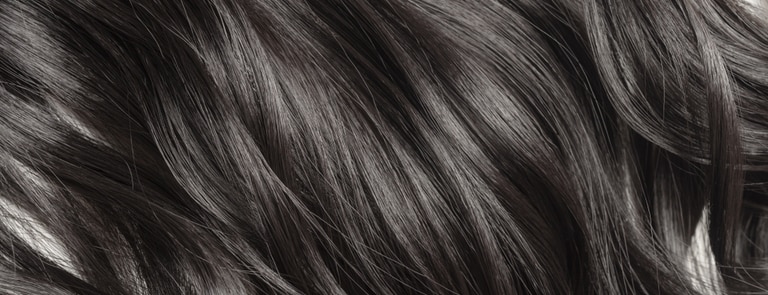
Jet black
As the name suggests, this is jet black, but here’s a tip for you. Don’t ask for jet black, ask for dark brunette if you want more of a natural-looking black.

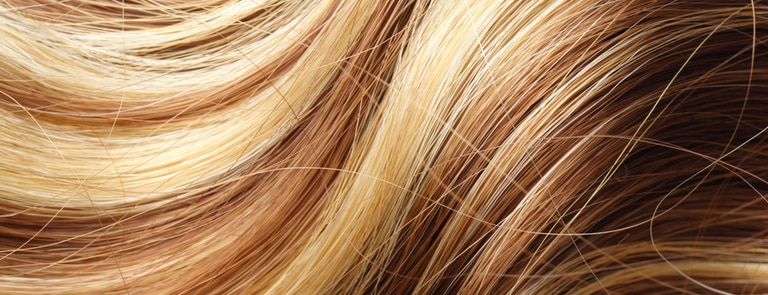
Honeyed highlights
Think lots of honey-blonde highlights that lift brunette hair without going too blonde.

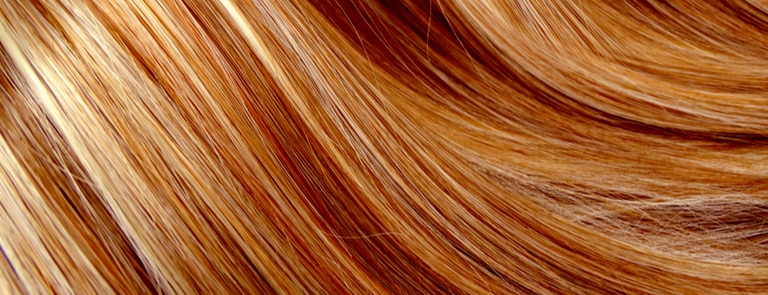
Buttery hints
How gorgeous does this sound?! Warm highlights (e.g. golden, honey, butter) are used rather than champagne or platinum hues.

Ways to dye your hair
If you’re having your hair dyed professionally, then your hairdresser will ask you how you want your hair to be dyed. How much or how little you want your hair dyed will inform how they apply your hair dye.
For instance, you can have:
A full head
This is where all your hair is dyed.11
Top section or half a head
This involves just dyeing the top layer or top half of your hair (everything underneath will remain the same, so if your hair’s long enough to put into a pony, you’ll see the non-dyed colour below).11
Highlights
Highlights are where small sections of your hair are dyed, usually lighter to add more depth to your hair.12
Lowlights
Lowlights are the same, however it’s usually 2-3 shades darker than your base to deepen your natural hair colour.
Balayage
Balayage hair colour is one of the most popular trends of the moment and involves hair being dyed using a freehand approach to give more of a natural finish.12 (Note – balayage is not the same as ombre. Balayage is the hair dyeing technique, while ombre is a gradient of colour).13
How to be colour-safe
Always conduct a skin patch test at least 48 hours before using a box hair dye to check you’re not allergic, even if you’ve used that colourant before.23 If you’re visiting the hairdressers, request a patch test at least two days before your appointment.
If you’re dying your hair at home, follow the instructions on the packet for a patch test. Monitor your skin and health carefully; if you develop any redness, itchiness or burning, or you start to feel poorly, avoid using the hair dye.23
Even if your skin doesn’t react, avoid prolonged contact with hair dye chemicals. Wear gloves while applying the dye, don’t leave it on your head longer than recommended, and thoroughly rinse it off.
What can I use instead?
If you think that you are allergic to PPD it is recommended that visit your doctor to be referred to an allergy clinic.23
You could switch to natural dyes such as henna, derived from the Lawsonia inermis plant, which has been used for centuries as a natural hair dye in countries like India.24
Or switch to semi-permanent hair dyes. Take care though – if you are switching to semi-permanent, consider avoiding Para-toluenediamine sulfate (also known as PTDS) as 40% of PPD allergy suffers also reacted to this dye.
If you think that you are reacting to the chemicals/irritants in the hair dye such as ammonia switch to vegetable-based dyes that are free from ammonia and other additives.
Don’t forget your patch test, though, as you can still react to natural ingredients.
How to dye your own hair at home
Here’s our five easy steps to dyeing your own hair:25
- Select a hair dye that’s suitable for you
Once you’ve decided on your shade and checked the ingredients, spend some time thinking about if you want a temporary or permanent colour change.
- Patch test the hair dye
As we mentioned a bit further up, the certain ingredients may mean you wind up having a reaction to hair dye. Always carry out a patch test 48 hours beforehand.
- Brush your hair and section it into four
Separate your hair it into four equal parts (two at the back and two at the front). This will make application much easier and allow you to measure out the dye properly.
- Apply the dye evenly and in the right places
If you’re colouring all of your hair, make sure you go right from the roots to the tips. If you’re just doing your roots, you only need to apply the dye there. Then, leave it to take.
- Rinse off the dye and condition your hair
Wash the dye out until the water runs clear and condition your hair. Ta-dah, all done!
How to naturally lighten your hair
Are you dreaming of sun-kissed locks?
Going to the salon where they use professional hair dye is one option, but if you’d rather save time, money and avoid harsh chemicals, there are other options.
You may be wondering how to naturally lighten hair using at-home methods.
Some people harness the power of the sun’s rays alongside natural lightening agents like honey, lemon juice and even vinegar to lift the colour of their strands.
But what results can you expect? Can you really get lighter hair without using bleach or dye?
What are the benefits of lightening your hair naturally?
It’s cheaper
With a full head of highlights costing upwards of £100 in many salons, going the natural route is the most budget-friendly option.
Considering you’re likely to have these natural lightening agents in your kitchen cupboard anyway, the cost of natural hair lightening is next to nothing.
You avoid chemicals
To achieve a lightened look with dye, you’d have to use bleach, high-lift dye or permanent hair dye.
These formulas are effective – usually giving several shades of colour lift in just one application.
However, they also contain chemicals including peroxide, ammonia, toluene, para-phenylenediamine, and lead acetate.26,27
The effect of breathing these in on a regular basis isn’t entirely known – but some chemicals in hair dye have been linked with adverse health effects in large amounts.26
The effect is gradual
A salon dye job can be a dramatic transformation – but what if that’s not what you’re after?
Natural lightening methods offer a gradual approach to lightening which won’t have you looking in the mirror wondering who is looking back!
Natural lighteners allow you to increase the lightening effect with further applications as it suits you.
Gentler on the scalp
Commercial hair dyes and bleaching agents can be harsh on the delicate skin on your scalp.
Itching, tingling, and redness of the scalp aren’t uncommon when undergoing hair bleaching, especially if heat is applied to boost the development.28
By going the natural route, you’re dodging the discomfort and allowing your scalp to breathe.
Less upkeep
When you dye your hair a lighter colour, regrowth can be visible in at little as two weeks.
Even in the hands of the best colourists, you’ll be left with a harsh line marking where your natural colour is growing in.
Even natural highlights should be touched up every 6 – 8 weeks to avoid the rooted look.
When using natural methods to brighten your hair, the lighter strands will be subtle, and regrowth won’t be a concern.
Available on your own schedule
You won’t always be able to get to the salon for a much-needed touch-up appointment.
Natural highlighting methods can be done at home, without taking time out from your other activities.
All you need is an ingredient or two from the kitchen – and a sunny day!
Softer results
How many of us take our skin tone, eye colour and even wardrobe into account when choosing a new, brighter hair colour?
Lighten your hair naturally for subtle results like brighter highlights and tones on the strands the sunlight usually catches.
You won’t have to deal with that brassy block of colour you can see a few weeks after a dye job.
Better for your hair
Bleach and other permanent lighteners are incredibly harsh on the hair.
To dye a strand of hair, the formula must penetrate the first two layers – the cuticle and the cortex – to degrade the melanin (the pigment which gives hair its colour) located in the medulla beneath.
As a result, there is extensive damage to the cuticle and cortex, which are responsible for the hair looking sleek and smooth.29
Better for the environment
Where does hair dye go once it’s been washed down the drain?
Unfortunately, into the ecosystem.
Some of the chemicals in hair dye and bleach may cause environmental toxicity, and the effects of this are only just being studied.30
And the cons?
It’s not for every hair type
Unfortunately, using natural extracts to lighten hair won’t work with every hair type.
Very thick, dark hair and black hair may not lighten at all using natural methods.
This is because they’re not powerful enough to penetrate dark hair strands and lighten the large quantity of melanin (colour-causing pigment) inside.
In grey hair, using lemon juice may remove some yellowing and improve overall brightness.
The hair type which is best suited to natural lightening is fine and light brown, dark blonde or medium blonde. You may need to purchase a specific hair dye for dark hair if you’re looking to lighten your dark locks.
It isn’t instant
Naturally lightening your hair can also take longer to achieve visible results.
It may take several days and multiple applications of natural methods before you start to see any changes.
It can still be harsh on the hair
Ironically enough – choosing to lighten your hair the natural way could still end up causing damage (although not as much as bleach).
Lemon juice and baking soda are especially drying on the hair, so stock up on treatment masks.
Summary
- Lightening hair naturally is cheaper, safer, subtler and less damaging to the hair
- Natural hair lightening methods are less effective and take longer than dye
- Natural lightening methods may not work on thick, dark hair
How to lighten hair naturally overnight
Unfortunately, there isn’t any natural way to lighten locks as you sleep.
Natural methods may yield visible results in just one application – but the effect will be very subtle, and more time is required to show results.
What causes hair to lighten naturally?
It’s the sun’s rays that cause the melanin pigment inside some shades of hair to degrade, thus slightly lightening the colour.
Agents such as lemon juice, baking soda, salt and vinegar help lift the hair’s cuticle and make the VIS and UV rays more able to penetrate and break up some of the melanin.31,32
How to lighten hair without damage
The reality is, to lighten a strand of hair at least some of the melanin pigment must be broken down.
Melanin is buried deep within each strand. To get to the melanin, both commercial dyes and effective natural methods must lift the hair’s cuticle.
Therefore, it’s not really possible to lighten hair without some degree of damage.
However, compared to the extensive damage of bleaching (which dissolves melanin) or other chemical processes, natural methods are much gentler on the hair.33
How to remove hair dye
If you’ve grown sick of your current hair colour and are keen to either go back to your natural shade or try a brand new one, you have two options to consider.
The first is to simply wait until the dyed hair has grown out and then snip it off.
The second, much faster option, is to remove the hair dye yourself.
Can I remove any hair dye?
Whether you can remove your hair dye at all will largely depend on the type of dye you originally used:
Permanent dyes
Permanent box hair dye does what it says on the tin and can be almost impossible to remove without bleaching it. All you’ll be able to do is dye over the top of it, a process which doesn’t always achieve the desired shade and could also damage your hair.
Semi-permanent dyes
If you’ve opted for semi-permanent hair colour, it’s possible to remove it safely and easily if you have the right know-how.
Wash in, wash out dyes
For wash in, wash out dyes, all you’ll need to do is simply have a shower!
1. The vinegar method
What you’ll need:
- White vinegar
- Warm water
What to do:
- Mix equal parts vinegar and warm water together (the amount you need will depend on the length of your hair).
- Apply the mix all over your hair and the wring out any excess. You might want to put a shower cap on to keep your hair contained and prevent the vinegar mix from dripping.
- Leave for around 15 minutes and then wash your hair.
- Repeat again if needed.
2. The shampoo method
If you don’t like the sound of putting vinegar on your hair, you might see some results purely by washing your hair a few times. While shampoos containing sulphates are not usually recommended as they can dry the hair out, they can be very effective at easing the colour out of dyed hair.
For the best results, leave some on your hair for around 20 minutes.
After you’ve attempted one of these hair dye removal methods, make sure you condition your hair to replenish its moisture levels and help keep it soft.
The final say
That wraps up all our information on the world of hair dyeing. Feeling confident enough to make some decisions? Whether you’re going to try it at home or head to the salon, we hope you feel fabulous and fresh with your new do.
If you have sensitive skin, eczema, psoriasis, acne or rosacea, consult a dermatologist before trying any methods at home.
Last updated: 6 September 2021
- https://www.bustle.com/articles/88388-how-to-choose-the-right-hair-color-for-your-skin-tone-and-how-to
- https://www.rd.com/list/best-hair-color-for-your-skin-tone/
- https://www.rush.co.uk/blog/how-to-guide/right-hair-colour-skin-tone/39237#:~:text=1%3A%20Look%20at%20your%20veins,veins%20indicate%20a%20warm%20undertone.
- https://www.goodhousekeeping.com/beauty/hair/g2754/haircolor-hacks-at-home/
- https://www.totalbeauty.com/content/blog/can-you-dye-wet-hair-tbk-170822
- https://www.byrdie.com/dying-black-hair-brown#:~:text=If%20you%20have%20virgin%20black,turn%20brown%2C%22%20Lee%20explains.
- https://www.bustle.com/articles/150230-7-fun-colors-to-dye-your-blonde-hair-if-youre-looking-for-a-change
- https://oureverydaylife.com/how-to-darken-bright-red-hair-12600269.html
- https://botoxcapilar.org/en/what-happens-if-you-put-blonde-dye-on-red-hair/#:~:text=If%20you%20use%20blonde%20dye,the%20color%2C%20not%20lightening%20it.
- https://www.goodhousekeeping.com/beauty/hair/g3027/best-hair-color-trends/?slide=1
- https://www.treatwell.co.uk/treatment-files/foils-vs-highlights-whats-the-difference/
- https://missouricosmo.com/5-types-of-hair-color-techniques/
- https://www.marieclaire.com/beauty/a15894484/balayage-ombre/
- www.nhs.uk/conditions/hair-dye-reactions/
- https://www.ncbi.nlm.nih.gov/pmc/articles/PMC4387693/
- http://www.compoundchem.com/2015/05/14/hair-dyes/
- www.ncbi.nlm.nih.gov/pubmed/15298493
- www.ncbi.nlm.nih.gov/pubmed/20860738
- http://www.mdpi.com/2079-9284/2/2/110/htm
- https://chemicalwatch.com/53894/us-fda-petitioned-to-prohibit-lead-acetate-in-hair-dye
- www.who.int/mediacentre/factsheets/fs379/en/
- www.fda.gov/Cosmetics/ProductsIngredients/Products/ucm143075.htm
- www.nhs.uk/conditions/hair-dye-reactions/
- https://www.sciencedirect.com/science/article/pii/S0378874114004115
- https://www.marieclaire.co.uk/beauty/how-to/how-to-dye-your-own-hair-6656
- https://www.madesafe.org/toxic-chemicals-hair-dye-safer-options/
- https://www.ncbi.nlm.nih.gov/pmc/articles/PMC4387693/
- https://www.ncbi.nlm.nih.gov/pmc/articles/PMC3664529/
- https://onlinelibrary.wiley.com/doi/abs/10.1111/ics.12495
- https://www.sciencedirect.com/science/article/abs/pii/S0013935120301456
- https://pubmed.ncbi.nlm.nih.gov/15264056/
- https://pubmed.ncbi.nlm.nih.gov/17728939/
- https://pubmed.ncbi.nlm.nih.gov/21882590


